

Are you frustrated by slow website speeds or users leaving your site before it even loads? In 2025, website performance is more critical than ever, especially for WordPress site owners aiming to stay competitive.
This guide will show how quic cloud cdn can transform your website’s speed, reliability, and global accessibility. Discover practical steps, real-world performance gains, and advanced optimisation tips.
We will explore what makes quic cloud cdn unique, walk through setup, cover best practices, and compare leading CDN options. Ready to boost your site’s performance? Let’s get started.
Understanding Quic Cloud CDN: Features and Benefits
Website owners seeking to boost speed, reliability, and reach often look to content delivery networks. But what sets Quic Cloud CDN apart, and how does it work with the latest LiteSpeed technologies? Let’s break down the essentials.
What is Quic Cloud CDN?
Quic Cloud CDN is a next-generation content delivery network designed specifically to integrate with LiteSpeed technologies. Unlike traditional CDNs that mainly cache static assets, Quic Cloud CDN offers full-page caching for both static and dynamic HTML content. This means visitors around the world experience faster load times, not just for images or scripts, but for the entire page.
A key differentiator is its true HTTP/3 support. HTTP/3, built on the QUIC protocol, ensures faster, more reliable connections even on unstable networks. For modern websites, especially those built on WordPress with LiteSpeed, this provides a significant edge in both speed and resilience.
Core features and advantages
What makes Quic Cloud CDN stand out is its feature set tailored for dynamic, modern websites:
- HTML (dynamic content) caching: Delivers improved time to first byte (TTFB) globally, ensuring visitors see your content in record time.
- Static asset caching: Flexible options allow you to cache images, CSS, and JavaScript, reducing server load and bandwidth.
- Seamless integration: Works hand-in-hand with LiteSpeed Cache and WordPress, making setup and ongoing management straightforward. For a deeper dive on this integration, see Building a modern WordPress tech stack.
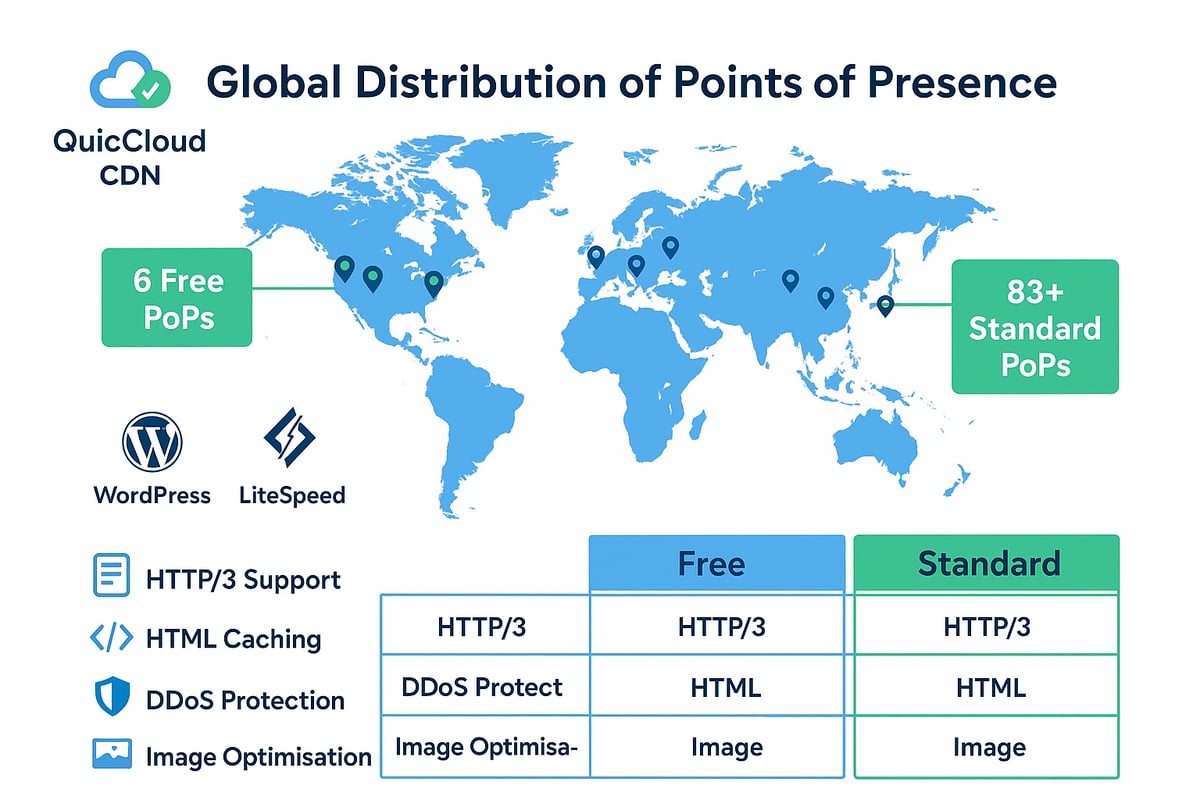
- DDoS protection and PoPs: The free plan provides 6 regional PoPs in the US and Europe, while the standard plan expands this to 83+ PoPs worldwide as of 2025.
- Image and page optimisation: Built-in tools like low quality image placeholders (LQIP) and critical CSS speed up rendering and improve user experience.
- Security: Advanced DDoS protection and regional filtering keep your site safe and responsive.
Tests from KeyCDN reveal that with Quic Cloud CDN’s HTML caching, TTFB scores are consistently faster compared to many other CDN solutions. This is especially valuable for sites with global audiences.
Who should use Quic Cloud CDN?
Quic Cloud CDN is ideal for WordPress users hosted on LiteSpeed servers, as it leverages deep integration for effortless setup and maximum performance. E-commerce platforms and high-traffic sites will benefit most from its dynamic content acceleration and robust security features.
If your priorities include achieving top Core Web Vitals scores and boosting SEO performance in 2025, Quic Cloud CDN offers a competitive advantage. Its flexible plans also suit businesses scaling globally or those needing granular control over caching and optimisation.
Plans, Pricing, and Choosing the Right Quic Cloud CDN Setup
Choosing the right quic cloud cdn setup is key to unlocking the best performance for your WordPress website. With options ranging from a generous free plan to a robust standard plan, it is important to understand what each tier offers, how pricing works, and which features align with your site's requirements.
Free vs standard plan breakdown
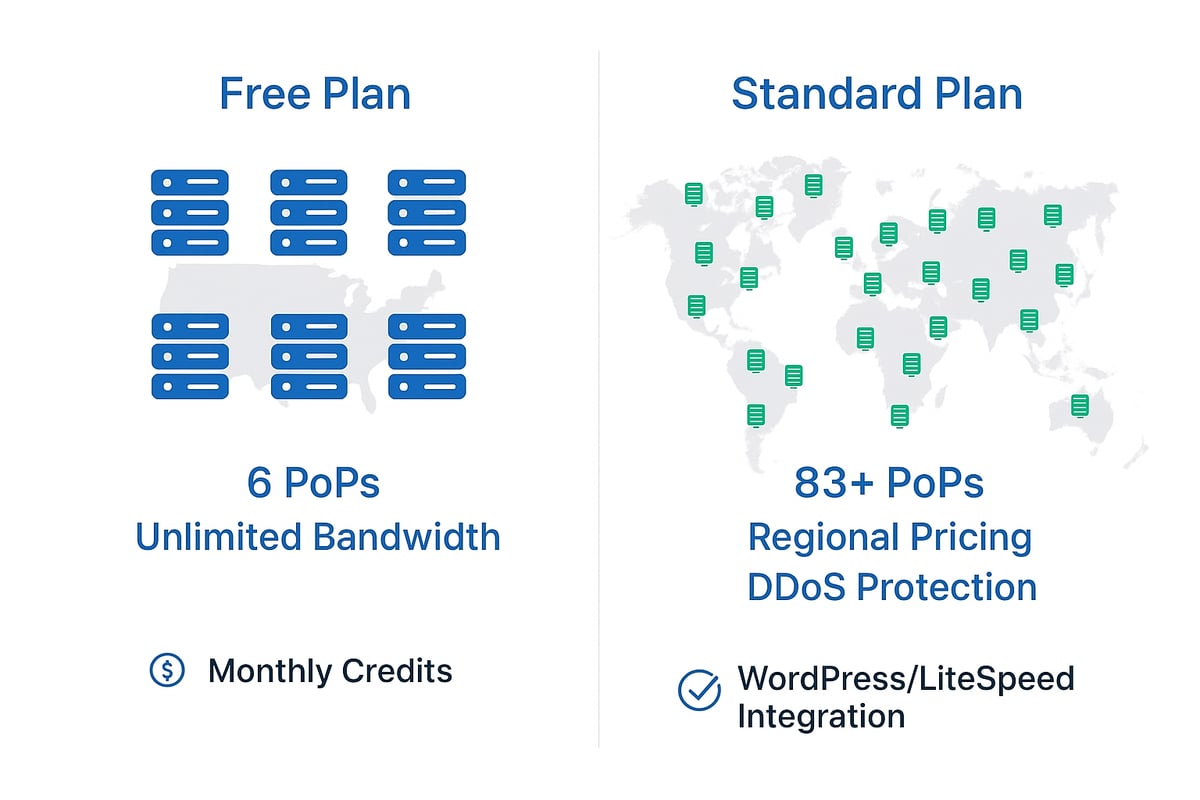
The quic cloud cdn offers two main plans: Free and Standard. The free plan gives you unlimited bandwidth and access to six Points of Presence (PoPs) focused in the US and Europe. However, it does not include DDoS protection. The standard plan expands your reach to 83+ PoPs worldwide, introduces regional pricing (typically 2–8 cents per GB), and adds advanced features like DDoS protection.
Both plans use a flexible credit and quota system. Each month, you receive free credits that can be spent on CDN bandwidth or optimisation services, such as image and page optimisation. If you need more, you can purchase additional credits. The type of server you use also affects your quota. For example, LiteSpeed Enterprise users receive up to ten times more free credits than non-LiteSpeed users.
There are several tiers: Non-LiteSpeed, LiteSpeed Server, Enterprise, and partners. Each comes with its own benefits and credit allocations, making it easy to scale as your site grows. For a detailed walkthrough on setting up your plan and making the most of these features, see the QUIC.cloud Setup Guide 2025.
Feature comparison and value
When comparing features, the standard plan stands out for its security and global coverage. Only the standard plan includes advanced caching options, DDoS protection, and a broad PoP network that rivals BunnyCDN and Cloudflare. The free plan is great for smaller sites or those with local audiences, but global businesses see significant speed gains from the expanded network.
Credits and quotas are used for image optimisation, page optimisation, and CDN traffic. The table below summarises the key differences:
| Feature | Free Plan | Standard Plan |
|---|---|---|
| PoPs | 6 (US/EU) | 83+ (Global) |
| Bandwidth | Unlimited | Pay-as-you-go |
| DDoS Protection | No | Yes |
| Image/Page Optimisation | Yes (quota) | Yes (quota) |
| Monthly Free Credits | Limited | Up to 10x more* |
*Enterprise users benefit from higher monthly credits.
For users who value security, scalability, and performance, the standard plan provides a comparable experience to other leading CDNs, with the added advantage of dynamic HTML caching and deep integration with WordPress.
Assessing your needs
To choose the right quic cloud cdn plan, start by evaluating your current website traffic and where your audience is located. If your visitors are mostly in North America and Europe, the free plan may be sufficient. For a truly global reach or high-traffic sites, the standard plan is a better investment.
Check your hosting environment. The quic cloud cdn works best with LiteSpeed-powered WordPress sites, but can also benefit non-LiteSpeed setups with some limitations. Consider your site's growth plans, security requirements, and whether you want to combine quic cloud cdn with another provider for DNS or static asset delivery.
In summary, match your plan to your site's needs, budget, and growth potential. The right setup ensures you get the best speed, reliability, and value from your quic cloud cdn investment.
Step-by-step Guide: Setting Up Quic Cloud CDN for WordPress
Setting up Quic Cloud CDN for your WordPress site can dramatically improve speed, reliability, and global reach. Follow this detailed guide to ensure a smooth integration and optimal results. Whether you're new to content delivery networks or migrating from another provider, this step-by-step approach will help you maximise the benefits of Quic Cloud CDN without disruption.
Prerequisites and preparation
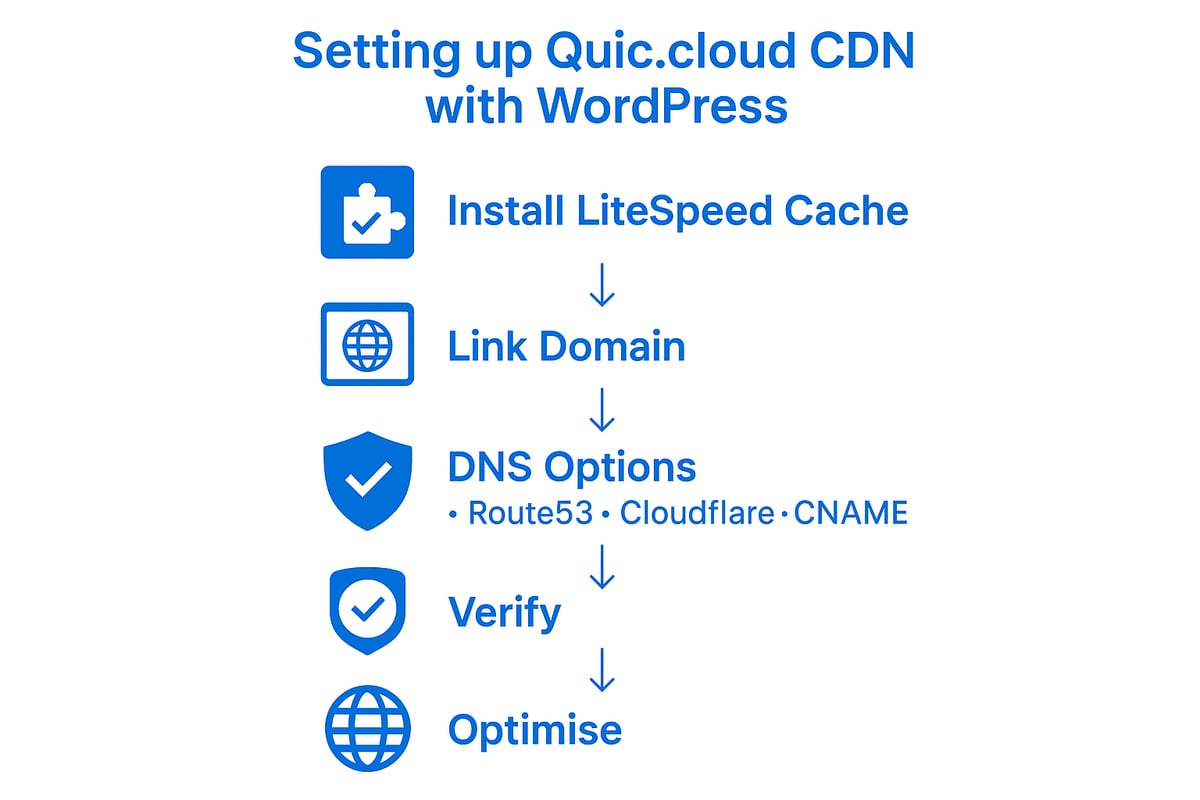
Before you begin, ensure your WordPress site is ready for Quic Cloud CDN integration. Start by installing and configuring the LiteSpeed Cache plugin. This plugin is essential, as it provides the bridge between your WordPress site and Quic Cloud CDN.
Obtain your domain key directly from the LiteSpeed Cache general settings. Enter your server IP to complete the initial configuration. Always back up your website before making major changes, as this prevents data loss if anything goes wrong.
If you need guidance on preparing your hosting environment, refer to the WordPress hosting and maintenance guide for comprehensive setup tips.
Step 1: Enable Quic Cloud CDN in LiteSpeed Cache
Navigate to your WordPress dashboard and open the LiteSpeed Cache plugin settings. Under the General tab, locate the Quic Cloud CDN option and turn it on. Ensure CDN Mapping is set to off for the initial setup.
This step activates the communication between your WordPress site and the Quic Cloud CDN network, preparing your site for further configuration. Double-check that the plugin is updated to the latest version for compatibility.
Step 2: Link your domain to Quic Cloud
Within the LiteSpeed Cache settings, click the ‘Link to Quic Cloud’ button. This will prompt you to register or log in to the Quic Cloud dashboard. Once logged in, your domain is auto-added to your Quic Cloud account.
This linking process ensures your domain is recognised by Quic Cloud CDN and ready for service activation. If you manage multiple domains, repeat this process for each one.
Step 3: Activate CDN in Quic Cloud dashboard
In your Quic Cloud dashboard, select the domain you wish to accelerate. Navigate to the CDN section and enable the service. This action starts routing your site’s traffic through the Quic Cloud CDN infrastructure.
Activation may take a few minutes as the system propagates settings globally. You will see status updates within the dashboard confirming activation.
Step 4: Choose your connection method
Selecting the right connection method is critical for performance. Quic Cloud CDN supports three main options:
| Method | Speed | Complexity | Notes |
|---|---|---|---|
| Quic Cloud DNS | Fastest | Easiest | Uses AWS Route53, change nameservers |
| Cloudflare DNS | Faster | Moderate | CNAME method, set DNS to ‘DNS only’ |
| CNAME (External) | Variable | Advanced | Update DNS in hosting panel (e.g., cPanel) |
For most users, Quic Cloud DNS offers the simplest and most reliable experience. If you prefer Cloudflare DNS, use the CNAME method and set DNS records to ‘DNS only’ to avoid conflicts.
Add the provided CNAME or nameserver records at your domain registrar or hosting control panel. Each method has detailed walkthroughs in the Quic Cloud dashboard. Choosing the right method ensures your Quic Cloud CDN delivers optimal speed to your visitors.
Step 5: Verify CDN is working
After updating your DNS, return to the Quic Cloud dashboard. Look for confirmation messages indicating ‘Using DNS’ or similar. This status signals that your traffic is routed through Quic Cloud CDN.
Check analytics within the dashboard to see traffic served via the CDN. For technical verification, use HTTP/3 test tools to confirm that the protocol is active. These steps ensure your setup is successful and that visitors are seeing the speed benefits.
Step 6: Configure CDN settings for optimal performance
Now, fine-tune your Quic Cloud CDN settings for the best results. Enable static cache unless you are using another CDN for static files. Activate the Quic backend, which ensures HTTP/3 communication between the CDN and your origin server.
Adjust security features such as reCAPTCHA, brute force protection, and XML-RPC restrictions to match your site’s needs. These settings help protect your WordPress site while maximising speed and reliability. Customise cache TTL and asset rules for your content type.
Step 7: Upgrade and region selection (if needed)
If your audience is global or you require additional features, consider upgrading from the free to the standard Quic Cloud CDN plan. The standard plan offers over 83 Points of Presence, compared to just 6 on the free plan.
Within the dashboard, select the regions most relevant to your audience. This ensures your content loads quickly, no matter where visitors are located. Upgrading unlocks advanced security and performance features for larger or more demanding websites.
Step 8: Whitelisting and troubleshooting
On most LiteSpeed server versions, Quic Cloud CDN IPs are auto-whitelisted. However, if you are running an older setup, you may need to whitelist IPs manually in your firewall or security plugins. This prevents legitimate CDN traffic from being blocked.
Common issues include DNS propagation delays, CNAME misconfigurations, and .htaccess redirects interfering with CDN routing. If you encounter errors, double-check all DNS and plugin settings, and consult the Quic Cloud documentation for troubleshooting tips.
Advanced Optimisation with Quic Cloud: Images, Pages, and Beyond
Unlocking the full potential of your website’s speed and user experience requires more than just basic caching. With quic cloud cdn, you gain access to a comprehensive suite of advanced optimisation tools that target both images and pages, ensuring your site loads quickly for visitors around the globe. Let’s explore how these features work together to deliver measurable results.
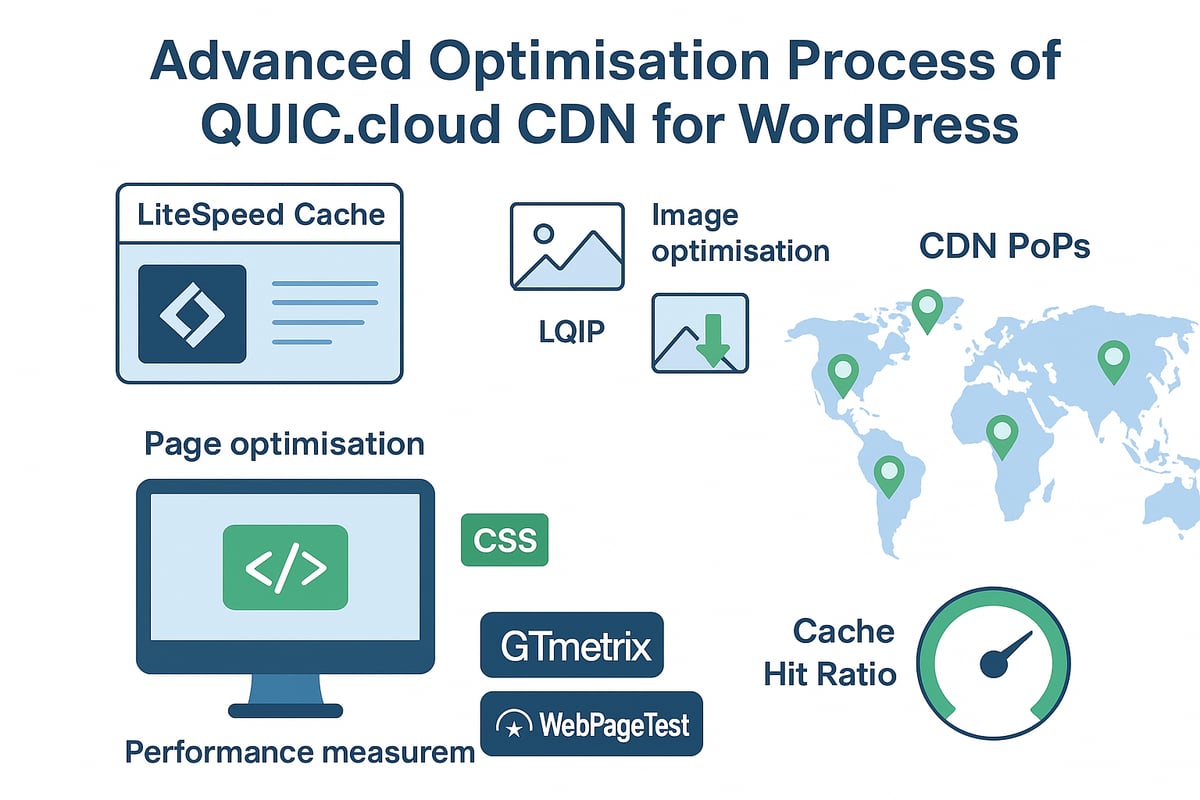
Image and page optimisation features
Quic cloud cdn offers robust image and page optimisation capabilities built directly into its platform. For images, features like Fast Queue and Low Quality Image Placeholder (LQIP) ensure that even large visuals load smoothly, minimising impact on page speed. Fast Queue processes image optimisation requests efficiently, while LQIP displays temporary, low-resolution placeholders until the full images are ready.
Page optimisation is equally important. Quic cloud cdn generates Critical CSS (CCSS) and Unique CSS (UCSS) for each page, ensuring that only the necessary styles are loaded above the fold. This technique reduces render-blocking resources, directly improving Core Web Vitals metrics. To activate these features, simply enable image optimisation and page optimisation within the LiteSpeed Cache plugin and monitor your quota usage in the Quic Cloud dashboard.
- Enable Fast Queue for rapid image processing
- Activate LQIP for better perceived loading times
- Use CCSS and UCSS to optimise above-the-fold content
Monitoring your optimisation quota is essential, as each processed image or page consumes credits. Regularly check your usage in the dashboard to avoid interruptions.
CDN config settings deep dive
Fine-tuning quic cloud cdn settings can significantly boost your site’s performance and reliability. Key configuration options include cache Time-to-Live (TTL) for various file types, custom cache rules, and security settings such as DDoS protection and reCAPTCHA.
Adjusting cache TTL ensures assets remain fresh but are not repeatedly fetched from the origin, reducing server load. You can specify different TTLs for HTML, images, CSS, and JavaScript files. Security options, like brute force protection and XML-RPC restrictions, help safeguard your site against common threats.
Here’s a quick summary table:
| Setting | Purpose | Recommended Action |
|---|---|---|
| Cache TTL | Controls asset freshness | Set longer for static files |
| Static cache | Offloads bandwidth from origin | Enable if not using other CDN |
| Security features | DDoS, brute force defence | Activate as needed |
Optimising these settings with quic cloud cdn helps maximise cache hit ratios and scalability, especially during high-traffic periods.
Combining Quic Cloud with other CDNs or services
Many high-traffic websites benefit from a hybrid CDN strategy, combining quic cloud cdn with other providers such as Cloudflare or BunnyCDN. This approach allows you to leverage Quic Cloud for dynamic content caching, while using an alternative CDN for static assets.
For DNS, you can choose between Quic Cloud DNS (powered by AWS Route53), Cloudflare DNS, or a CNAME method with your existing provider. Each option offers varying speeds and levels of redundancy. Cloudflare DNS is often faster, but Quic Cloud DNS provides the simplest integration for most users.
- Use quic cloud cdn for dynamic HTML caching
- Employ Cloudflare or BunnyCDN for static files
- Select a DNS method that prioritises your site’s speed and resilience
A multi-CDN setup can significantly reduce latency and improve uptime, especially for global audiences.
Measuring and tracking performance gains
To truly understand the impact of quic cloud cdn, ongoing measurement is crucial. Benchmark your site’s speed before and after optimisation using tools like KeyCDN Performance Test, GTmetrix, and WebPageTest. These platforms reveal improvements in Time to First Byte (TTFB), load time, and overall user experience.
Real-world data shows that quic cloud cdn can reduce TTFB by up to 40 percent for global visitors. For further insight, explore QUIC.cloud User Reviews to see how other site owners have experienced performance gains and identified areas for improvement.
Regularly monitor your cache hit ratio and optimisation quotas to ensure you are maintaining peak performance. Adjust settings as your site grows or your traffic patterns shift.
Troubleshooting and Best Practices for Quic Cloud CDN
Setting up quic cloud cdn can be straightforward, but ongoing optimisation and troubleshooting are essential for a seamless experience. By following best practices, you minimise downtime and maximise your website’s performance and reliability.
Common setup issues and solutions
When implementing quic cloud cdn, several common challenges can arise. DNS propagation delays are typical, especially after changing nameservers or updating CNAME records. It may take a few hours for changes to reflect globally, so patience is key.
- Double-check DNS settings for typos or missing entries.
- Ensure CNAME records are pointed to the correct quic cloud cdn endpoint.
- Look for .htaccess rules or redirects that might block CDN requests.
If you see downtime or errors, review your LiteSpeed Cache and CDN configurations. Often, a simple cache purge or plugin update resolves most issues. Always keep a recent backup before making significant changes.
Ensuring compatibility with themes and plugins
Aggressive caching from quic cloud cdn can sometimes interfere with dynamic content, especially for logged-in users or sites with advanced themes. Testing is crucial.
- Exclude sensitive pages or user-specific content from caching.
- Use LiteSpeed Cache’s “Guest Mode” for better compatibility.
- Review plugin documentation for any known conflicts with quic cloud cdn.
Some themes may require certain pages or scripts to bypass the cache. Monitor your site's functionality after enabling the CDN, and adjust exclusions as needed. Regularly update all plugins and themes to maintain smooth operation.
Security and reliability tips
Maintaining strong security is vital when using quic cloud cdn. Keep your LiteSpeed Cache and Quic Cloud plugins updated to benefit from new security patches and features. Enable DDoS protection, reCAPTCHA, and brute force defence within the CDN dashboard.
- Restrict XML-RPC if not needed.
- Monitor for suspicious login attempts or traffic spikes.
- Regularly review your security settings in both WordPress and quic cloud cdn.
For more comprehensive advice on safeguarding your site, explore security for WordPress websites. Proactive measures help ensure your site remains resilient, even during high-traffic events.
Scaling and maintenance
As your site grows, reassess your quic cloud cdn plan and regional coverage. Upgrading from the free to the standard plan expands your Points of Presence, which can significantly enhance speed for global visitors.
- Monitor analytics for cache hit/miss rates and traffic distribution.
- Adjust CDN settings and plan according to usage patterns.
- Stay informed about new features and updates from quic cloud cdn.
Regular maintenance is crucial. Schedule reviews, clear caches, and analyse performance metrics to keep your site running at peak efficiency. Proactive scaling and upkeep will future-proof your WordPress site.
Quic Cloud CDN vs Cloudflare, BunnyCDN, and Other Alternatives
Choosing the right content delivery network is essential for site performance, especially as global audiences grow. Let us break down how quic cloud cdn compares to leading options like Cloudflare and BunnyCDN in terms of network reach, features, and value.
Network coverage and PoP comparison
A CDN’s network coverage directly influences speed and latency for users worldwide. Quic cloud cdn currently offers 6 points of presence (PoPs) on its free plan, and over 83 on standard plans. BunnyCDN provides more than 90 PoPs, while Cloudflare leads with 250+ locations as of 2025.
| CDN | Free PoPs | Paid PoPs | DDoS Protection |
|---|---|---|---|
| Quic Cloud CDN | 6 | 83+ | Standard plan |
| BunnyCDN | 10+ | 90+ | Paid extra |
| Cloudflare | 250+ | 250+ | Free & paid |
While Cloudflare’s reach is unmatched, quic cloud cdn’s growing network and focus on WordPress performance make it a strong contender.
Feature-by-feature analysis
The core advantage of quic cloud cdn is its true HTML caching for dynamic WordPress content, something that sets it apart from most traditional CDNs. Cloudflare’s APO offers similar functionality, but integration is deeper with LiteSpeed servers.
DNS speed is another factor. Cloudflare’s DNS is recognised as the fastest globally, while quic cloud cdn uses AWS Route53 for its DNS, which is robust and reliable. Security-wise, all three providers offer DDoS protection on paid tiers, but Quic Cloud’s standard plan brings advanced anti-DDoS and brute force features.
For a detailed breakdown of unique features, integration, and performance, see this QUIC.cloud vs. Cloudflare Comparison.
Pricing and value for money
Pricing models differ significantly. Quic cloud cdn’s free plan includes unlimited bandwidth but limited PoPs and no DDoS protection. The standard plan unlocks full PoP coverage and advanced security, with regional pricing ranging from 2 to 8 cents per GB. BunnyCDN uses pay-as-you-go pricing, while Cloudflare mixes free features with paid add-ons.
Quic cloud cdn uses a credit system for bandwidth and optimisation services, offering monthly free credits and bonuses for LiteSpeed Enterprise users. When comparing value, the standard plan is most similar to BunnyCDN and Cloudflare in terms of reach and security.
Use case recommendations
Quic cloud cdn is ideal for WordPress sites on LiteSpeed servers, especially when dynamic caching and Core Web Vitals are priorities. For sites needing maximum global speed or redundancy, a hybrid approach using quic cloud cdn for dynamic content and Cloudflare or BunnyCDN for static assets can offer the best performance.
User data suggests that quic cloud cdn can deliver up to 40 percent faster response times for dynamic pages compared to native connections, making it a compelling choice for demanding environments.
Frequently Asked Questions about Quic Cloud CDN
What makes quic cloud cdn different from other CDNs?
Quic cloud cdn stands out due to its true HTTP/3 support and advanced dynamic content caching. Unlike many traditional CDNs, it caches HTML at the edge, greatly reducing TTFB. Its integration with LiteSpeed technologies allows for seamless WordPress performance. For a deeper understanding of its underlying technology, see this Performance Analysis of QUIC Handshakes.
Can quic cloud cdn be used with non-LiteSpeed servers?
Quic cloud cdn is designed for LiteSpeed environments, but limited functionality is available for non-LiteSpeed servers. Dynamic HTML caching requires LiteSpeed Cache, so those on other web servers may not access the full performance benefits.
How do credits and quotas work for bandwidth and optimisation?
Quic cloud cdn uses a monthly credits system. Free credits are provided each month, and additional can be bought as needed. Credits are consumed by CDN bandwidth, image optimisation, and page optimisation services. Monitoring your usage helps avoid service interruptions.
Is it possible to use quic cloud cdn with Cloudflare DNS or other CDNs?
Yes, you can use quic cloud cdn with Cloudflare DNS by employing the CNAME method and setting DNS to 'DNS only'. Many users combine quic cloud cdn’s dynamic caching with other CDNs for static assets.
What are the most common issues users face during setup?
Frequent setup issues include DNS propagation delays and CNAME misconfigurations. Always double-check DNS records and allow time for changes to take effect. Using the LiteSpeed Cache plugin correctly is essential for smooth integration.
How does quic cloud cdn impact Core Web Vitals and SEO in 2025?
By reducing server response times and optimising both static and dynamic content, quic cloud cdn helps improve Core Web Vitals scores. Faster load times and better reliability can lead to higher SEO rankings, especially as search engines focus more on user experience.
Where can users find further support and updated documentation?
Official documentation is available on the Quic Cloud website and LiteSpeed forums. For ongoing optimisation and troubleshooting tips, see these website maintenance best practices for WordPress.
Now that you understand how Quic Cloud CDN can elevate your WordPress website’s speed, security and global reach, it’s the perfect time to put these insights into action. Whether you’re aiming to improve Core Web Vitals, support a growing audience or simply want peace of mind with expert support, WPCTO is here to help you achieve seamless performance and reliability. If you’re ready to unlock your site’s full potential, let’s take the next step together.
Ready to transform your WordPress website?