

TL;DR:
- Proper planning, testing, and phased execution are essential to prevent costly website migration failures. Post-migration monitoring and a clear rollback plan ensure issues are addressed before impacting users. Comprehensive pre-migration audits and detailed checklists help agencies deliver seamless transitions and maintain client trust.
A website migration gone wrong is one of the most expensive mistakes a digital agency can hand to a client. Broken redirects, lost database records, tanked search rankings, and a frantic Sunday evening call from a client who can’t access their site. The step by step migration process outlined in this guide is designed to prevent exactly that. Whether you’re moving a client from one host to another, switching CMS platforms, or transferring a full e-commerce catalogue, the difference between a clean cutover and a disaster is almost always preparation, not technical skill.
Table of Contents
- Key takeaways
- Migration prerequisites and preparation
- The step by step migration execution
- Verification and post-migration troubleshooting
- Optimising the site after migration
- My honest take on why migrations go wrong
- How Wpcto handles migrations for agencies
- FAQ
Key takeaways
| Point | Details |
|---|---|
| Plan before you touch anything | Document every dependency and create a backup before writing a single migration step. |
| Test migrations save real projects | Running a full trial migration on staging catches data and integration issues before they hit live. |
| Automation covers around 90% | Manual steps are required for custom logic, integrations, and security configurations. |
| Phased approaches reduce risk | Incremental cutovers allow targeted rollback without large-scale disruption to live environments. |
| Post-migration monitoring matters | The first 30 days after go-live are critical for catching issues that only appear under real traffic. |
Migration prerequisites and preparation
You cannot build a reliable stepwise migration plan without first knowing exactly what you are moving. That sounds obvious, but agencies routinely begin migrations with an incomplete picture of what a WordPress site actually contains. Custom post types, third-party API integrations, caching configurations, and server-level rewrites rarely appear in a standard CMS export.
Start with a full audit of the current environment:
- Database structure and custom tables created by plugins or bespoke development
- Active integrations including payment gateways, CRM connections, and email service providers
- Server configuration files such as ".htaccess` rules, PHP version requirements, and cron jobs
- Media library structure and any files stored outside the standard
wp-content/uploadspath - User roles and permissions, particularly for multi-author or membership sites
Pre-migration dependency mapping prevents costly remediation projects later. Skipping this stage is the single most common reason migrations require emergency fixes within 48 hours of going live.
Timeline and resource planning
Standard migrations typically require 6 to 8 weeks for planning and full execution, with 1 to 2 weeks allocated specifically to data auditing. If you are quoting a client a weekend turnaround for a complex site, you are setting yourself up for a very difficult week.
| Task | Estimated time |
|---|---|
| Environment audit and dependency mapping | 3 to 5 days |
| Backup and staging environment setup | 1 to 2 days |
| Test migration and issue resolution | 4 to 7 days |
| Core data migration and content transfer | 2 to 5 days |
| Validation and pre-launch checks | 3 to 5 days |
| Post-migration monitoring (hypercare phase) | 14 to 30 days |
A rollback plan is not optional. Document every environment and define the exact criteria that would trigger a reversion to the original setup. Communicate this to your client before you start. It removes panic from the equation if something goes wrong.
Pro Tip: Involve your developer, account manager, and the client’s internal IT contact in a pre-migration briefing call. Cross-functional awareness prevents the scenario where a client’s team makes server changes mid-migration without telling anyone.
The step by step migration execution
This is the core of the migration guide. Follow these steps in sequence. Skipping or reordering them is where projects unravel.
-
Export and audit all data (Day 1 to 3). Export the full database, all theme and plugin files, and media. Run a schema audit to confirm data completeness. Log any anomalies before proceeding.
-
Provision and configure the target environment (Day 2 to 4). Set up the new hosting environment with matching PHP version, database configuration, and web server settings. Do not assume the new host mirrors the old one. Confirm it explicitly.
-
Run a trial migration on staging (Day 4 to 8). This is the most valuable step most agencies skip. Import everything to a staging environment and conduct a full functional review. Check forms, payment flows, login systems, and media rendering. Identify every issue before touching live.
-
Migrate core content and database (Day 8 to 10). Once staging is validated, replicate the process on the production target. Automated migration tools cost £40 to £160 per project depending on complexity and are worth using for large datasets. They reduce human error on repetitive transfer tasks.
-
Transfer and rebuild site components (Day 9 to 12). Reinstall plugins and themes in the correct order. Reapply any configuration settings that do not carry over in a standard database import. This includes widget placements, Customiser settings, and licence keys.
-
Implement SEO-safe redirects (Day 11 to 13). Map every URL that is changing and create 301 redirects. A DIY SEO audit before cutover helps you confirm which pages carry the most organic value and deserve the most careful redirect handling.
-
Reconnect integrations and test custom functionality (Day 13 to 14). API keys, webhook endpoints, and OAuth tokens often need updating in the new environment. Test every connected service individually.
-
Perform final pre-cutover validation (Day 14). Confirm DNS TTL has been lowered 24 hours in advance. Run through the complete migration checklist covering all functional and technical readiness criteria.
Phased migrations minimise risk by allowing immediate rollback and focused troubleshooting, rather than a large-scale failure that affects every user at once. For complex or high-traffic sites, consider migrating sections or user cohorts incrementally rather than cutting over everything in a single event.
Pro Tip: Before switching DNS, run through five to ten key user journeys on the new environment using a hosts file override. This lets you validate exactly what real users will experience without affecting live traffic.
If you want to see how much unearned revenue is sitting in your current WordPress client base, the Wpcto profit calculator takes under 90 seconds to give you a clear number. Worth doing before you consider handling the next migration yourself.
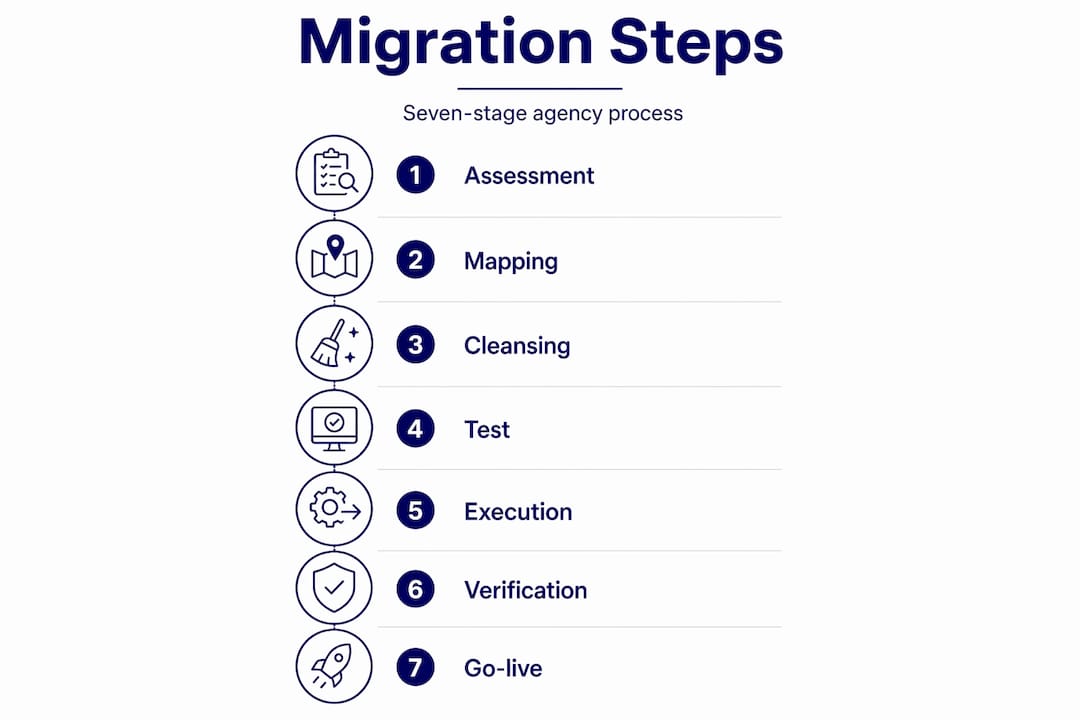
The seven best-practice phases for migration are assessment, mapping design, cleansing, test migration, execution, verification, and post-migration optimisation. Every step in the numbered list above maps to one or more of those phases.
Verification and post-migration troubleshooting
Go-live is not the finish line. It is closer to the halfway point. The verification phase is where migrations are actually won or lost.
Start with structured testing across both staging and live:
- Functional testing: every form, checkout, login, and interactive element
- Performance benchmarking: compare page load times against pre-migration baseline
- Data integrity checks: spot-check database records, user accounts, and transactional data
- SEO validation: confirm canonical tags, sitemaps, and robots.txt are correct in the new environment
- Cross-browser and mobile testing: do not assume a clean desktop experience means the mobile view is intact
One area most migration guides entirely overlook is identity and time synchronisation. Time synchronisation issues and identity-layer dependencies such as Kerberos authentication can cause intermittent failures that only appear after migration. These are invisible during testing because they only trigger under specific conditions, often at a time offset from the original setup.
Migration checklists must include verification steps for implicit dependencies such as time synchronisation and identity management. Checking that an agent is installed is not sufficient. You need to confirm it is functioning correctly in the new environment.
Define clear rollback criteria before go-live. If critical errors appear within the first four hours, at what point do you revert? Who authorises that decision? Having the answer documented in advance removes the hesitation that turns a contained problem into a prolonged outage.
Optimising the site after migration
The first 30 days after a migration go-live is the hypercare phase. Migration is an ongoing transformation, not a single transfer event. Real-world traffic reveals issues that no amount of pre-launch testing can fully predict.
During this period, focus on:
- Continuous uptime monitoring with alerts set to a threshold of 1 to 2 minutes downtime detection
- Performance optimisation: caching configuration, image compression, and database query analysis
- SEO monitoring: track organic visibility week on week and investigate any significant drops
- Residual redirect checks: use a crawl tool to find any chains or broken redirects introduced during migration
- Documentation updates: update all internal documentation to reflect the new environment, credentials, and configuration
Conduct a post-migration performance review at the 7-day, 30-day, and 90-day marks. Many performance optimisation opportunities only become visible once real user traffic patterns are established on the new infrastructure.
Pro Tip: Schedule a standing 30-minute review at the 30-day mark with both your technical lead and the client account manager. Reviewing performance data together prevents small issues from silently compounding into the next migration emergency.
Assessing technical debt before migrating is also worth considering carefully. Rebuilding or replatforming sometimes delivers better long-term value than a like-for-like migration of a site that was already struggling. Migration is a natural moment to ask whether the destination is actually worth moving to.
My honest take on why migrations go wrong
I have seen a lot of migrations. The pattern behind the ones that go badly is almost never a technical failure. It is a planning failure that then becomes a technical failure.
The number I keep coming back to is this: automated tools cover roughly 90% of a migration. That last 10% is where custom logic, bespoke integrations, and legacy security configurations live. It is also where most of the business-critical functionality lives. Agencies that treat automation as a complete solution rather than a starting point are the ones calling clients on a Sunday.
What I find most agencies underestimate is the post-go-live phase. There is enormous pressure to declare success at cutover and move on to the next project. But the real work is the 30 days that follow. Traffic patterns, edge case data, and real user behaviour reveal things no test environment can replicate. Treating go-live as the end, rather than the beginning of the verification period, is the mindset shift that separates migrations that hold from those that quietly degrade over weeks.
I also think the conversation around rollback criteria is deeply undervalued. Most agencies have a vague intention to roll back if things go wrong. Very few have a written threshold, a named decision-maker, and a tested reversal procedure. That gap is where migrations turn from problems into crises.
If you are managing WordPress migrations as part of an agency service, do the honest assessment first. Is it actually your core competency? If not, the risk sits with your client relationship, not just the technical project.
— Marcel
How Wpcto handles migrations for agencies
For agencies managing WordPress clients, migrations are one of the highest-risk, highest-effort tasks to absorb internally. Wpcto handles the full WordPress migration process for agency clients, covering environment setup, data transfer, redirect implementation, and post-migration monitoring. Our agency support services are designed to sit invisibly behind your agency so you retain the client relationship without absorbing the technical workload.
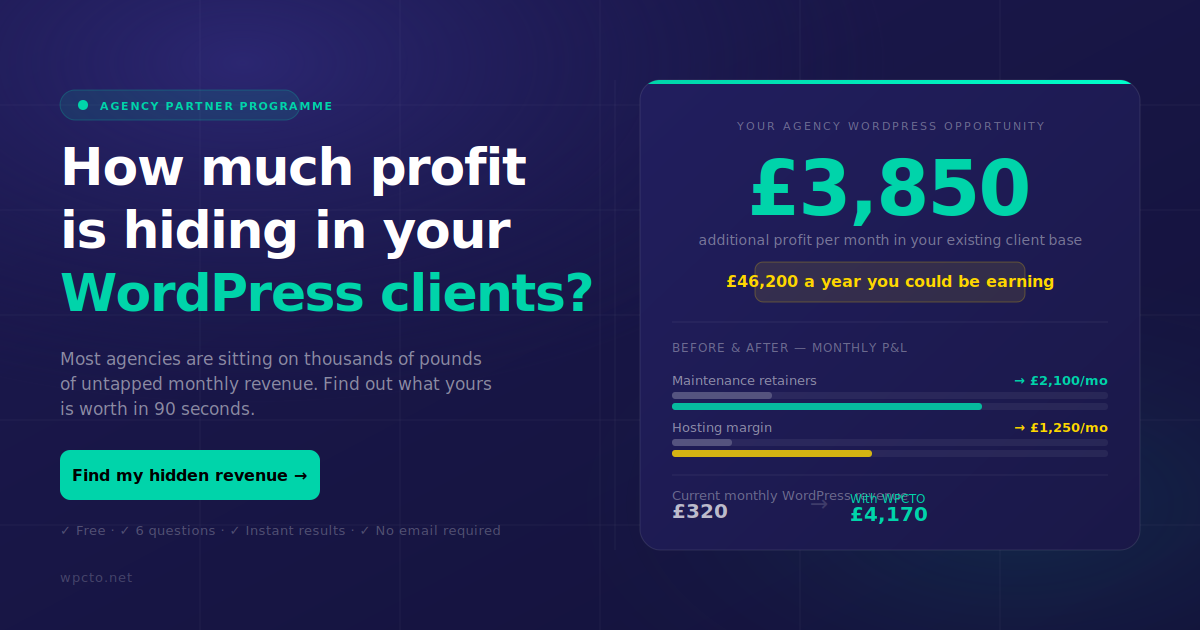
We also offer white-label WordPress support for agencies that want to extend their service offering without building an internal team. If you are curious how much uncaptured value already exists in your WordPress client base, the Wpcto profit calculator gives you a precise figure in under 90 seconds.
FAQ
How long does a website migration typically take?
Standard migrations take 6 to 8 weeks from planning through to post-migration monitoring. Smaller sites with minimal integrations can be completed in 2 to 3 weeks, but allocating less time than the project requires is a primary cause of post-launch failures.
What is the biggest risk in a website migration?
Data loss and broken integrations are the two most common failure points. Skipping the test migration phase and relying entirely on automated tools are the leading causes, since automation typically covers around 90% of the transfer and cannot handle custom logic or bespoke configurations.
Do I need a rollback plan for every migration?
Yes, without exception. A documented rollback plan with defined criteria and a named decision-maker reduces recovery time significantly and prevents a contained issue from becoming a full outage. This applies even to small migrations.
What should I test after migration go-live?
Test all forms, logins, payment flows, and interactive elements first. Then validate data integrity, SEO configuration, and performance metrics against your pre-migration baseline. Continue monitoring for at least 30 days, as some issues only appear under real traffic conditions.
Can I migrate a WordPress site without downtime?
With careful preparation, yes. Lowering DNS TTL 24 to 48 hours in advance, using a staging environment for final validation, and cutting over during low-traffic periods reduces visible downtime to a matter of minutes for most WordPress sites.